On Friday June 14th at the UBC Orchard Garden the Elementary Teacher Candidates started the day with a "Work Party" with Emily and Audrey, our garden leaders. Lots of weeding, clearing, clean up, creating paths and mulching happened this week. The garden is an idyllic spot that is a gem at UBC, and it is inspiring to see how many hands can make light work!
GARDENING IS HARD WORK BUT OH SO SATISFYING!
Now that many of the garden beds have been weeded it is time to plant! Today, squash seeds were planted directly into the soil every 2 feet. Bone meal and fertilizer were added to help the seeds succeed in their growth, not to mention water! The ground is dry, and we suspect it will be a hot summer.
PREPARING FOR PLANTING!
SOWING A SEED
IT'S IMPORTANT TO WATER THE PLANTS TO GIVE THEM THE BEST CHANCE FOR SUCCESS!
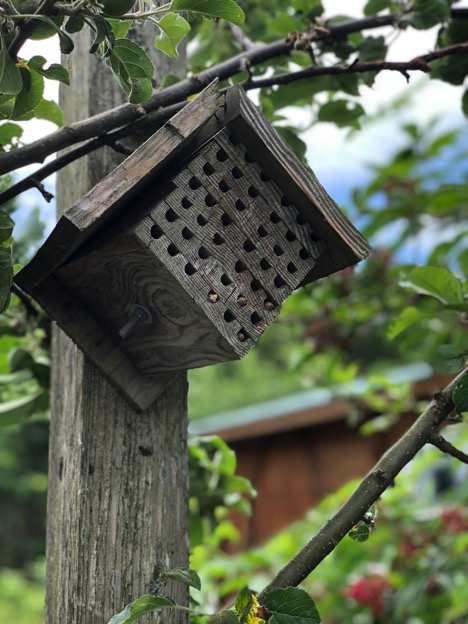
There is a mason bee house at the Orchard Garden that had been used in years past. Yesterday Susan and Bill Paley went to North Burnaby to collect honey bees for the garden and also mason bees, which are native to our area. Today we went for a little walk to look at the mason bee house and found that the bees had already started to build or nest inside the house. Mason bees are very effective pollinators who pose little to no threat of stinging. They are good friends to the UBC Orchard garden.
MASON BEE
MASON BEE HOUSE
In the afternoon, we had the pleasure of being led through a workshop by Susan on how to make beeswax food wraps! This was a highlight of the week since purchasing beeswax wraps in store can be costly and it was surprisingly easy to make.
First, we chose a piece of 100% cotton fabric so that the food that's being wrapped can breathe. Then we grated beeswax which can be purchased at Hives for Humanity or Main Street Honey Shoppe. It looked like mozzarella cheese!
Once we had enough we placed our piece of cloth on parchment paper and thinly sprinkled beeswax over the cloth. Then we added a few dollops of coconut oil. The coconut oil allows the wrap to adhere to itself with the heat of your hands because the melting temperature of the oil is a lot lower than the beeswax. Then we placed another piece of parchment paper on top and melted it with an iron.
The beeswax and oil melt through to the other side of the cloth so we only needed to iron one side. Then we waited for about a minute for the oil to cool and voila! We had our very own beeswax wraps!


No comments:
Post a Comment